Diskpart is very powerful Windows Utility, which allows certain number of operation with hard disk.
In this article we will show you how to assign, change or remove drive letter with Diskpart using.
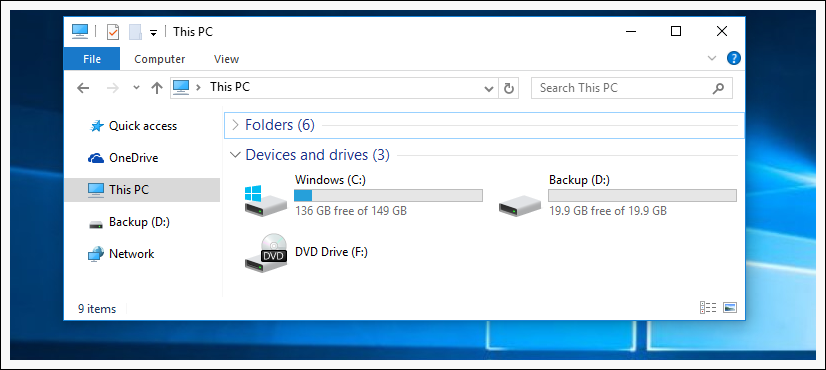
You bought hard drive for Backup, but it has automaticaly gained letter D. You want to change it to E.
First we need to open Command Prompt with Administrator Rights.
Type cmd into the search box, and then right-click and choose Run as administrator. If you have Windows 10 use the CTRL + SHIFT + ENTER keyboard shortcut on Screen 1, or click on Start with right click and choose Command Prompt (Admin) on Screen 2.

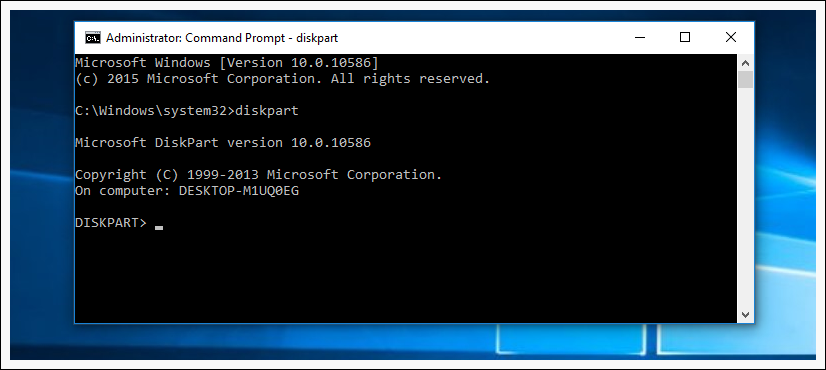
When Command Prompt pops up, run the diskpart command.
Now we type list volume to list our volumes, we need to know the number of our volume.
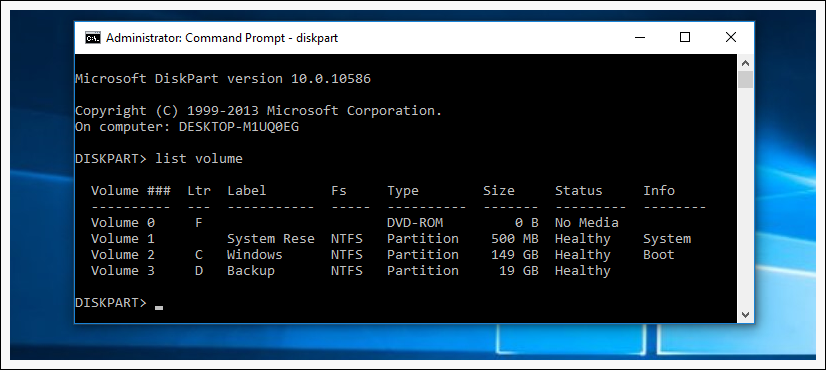
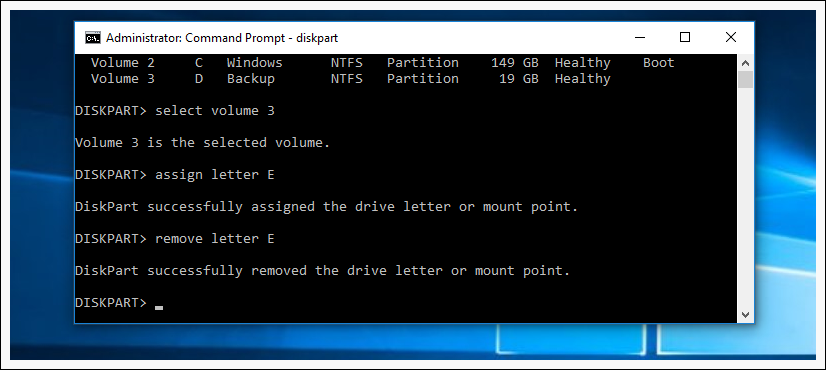
In our case our hard drive is Volume 3 and that number is 3.
Now we use command select volume 3 to make changes to that volume. If your volume number is different, you need to replace number 3 with the number from your volume. After we have selected our volume we use command assign letter E, to assing letter E to our volume.
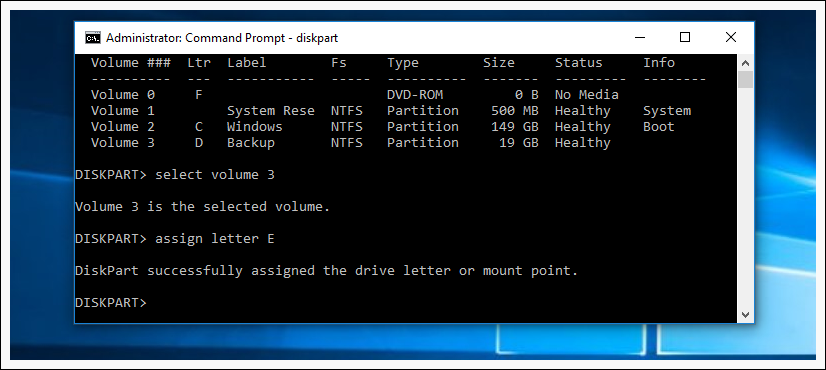
Now you know how to change or assign another letter to your volume, also if you need you can remove volume letter with command remove letter E
For security reasons you cannot change or remove your current system disk letter (esp C), it will not work.
To exit diskpart type in exit.

HowTos, HowTos: Windows, Know how: Windows, KnowHow
Tags: assign letter, change letter, diskpart, drive letter, remove letter